If your all time favorite science-fiction movie stars California’s governor, please stop reading this review now. Still here? Good because in all likelihood you have not heard of Primer, a newly released DVD from Shane Carruth. This film is a must see for any serious sci-fi fan or for that matter any serious connoisseur of fine independent cinema. This intellectually challenging movie was made for just $7,000.00 in the summer of 2001. That was one fantastic investment since it earned more than $425,000.00 in a limited theatrical run and won the 2004 Sundance Film Festival Grand Jury Prize. The film tells the story of Abe (David Sullivan) and Aaron (Carruth), two young, hard working, and ambitious engineers, who spend their evenings and weekends trying to become the next Steve Jobs and Steven Wozniak (the founders of Apple Computer for the trivia challenged) by creating and patenting new inventions in Aaron’s garage. While fine tuning one of these inventions, a machine which can counteract gravity, lowering an item’s apparent mass, the boys inadvertently discover that their device has some, well, unexpected capabilities too. Being careful not to spoil the story, it is fair to say that one of these capabilities seemingly allows Abe and Aaron to do just about anything they want and earn a ton of money in the process. From there the film looks at how absolute power affects the duo and examines how they deal with the consequences of their actions. To put it mildly, their lives change in unexpected and astounding ways. The plot is complex and void of exploding cars, supermodels dressed like hookers, and most of the normal Hollywood fare, in other words it is well written, if not a bit ambitious considering that many moviegoers will be challenged. The film is visually interesting, intense, and image driven. Viewers will find it hard to believe that much of the movie was filmed at Carruth’s parent’s house and a U-haul storage center. Almost a complex as this fine film’s story line, is the story of just how this movie was made. Carruth, who is math geek, wrote, directed, filmed, stared in, edited, and scored the movie. Carruth had worked at three engineering-oriented companies, but hated it. Then turned to writing short stories and novels, but soon realized that was not for him either. Eventually, Carruth hit on the idea of becoming a filmmaker. It didn’t seem to matter that he did not have the least idea about how movies were made. Carruth had very little money to invest in his new career, so Primer was made on a real shoe-string budget, but you wouldn’t know it from watching the movie, which looks every bit as good as major movies that can cost millions of dollars. In fact, Carruth’s tiny budget forced him to be creative, it almost makes you wonder if Hollywood should try forcing more filmmakers to be creative. The bottom line is that this PG-13 rated (for brief language) film is an excellent example of modern cinema well worth watching.
Wednesday, March 16, 2011
Primer: Perhaps the Smartest Sci-Fi Film of All Time
Quick Art Pieces You Can Do - Even If You're Not an Artist
Art is in the eye of the beholder, so to speak - and art takes many forms - from beautiful hand-painted pieces of intense imagination, or chunky-looking piles of junk that make you scratch your head and wonder. If you’re in need of some nice artwork on your walls, you’re no artist, and you definitely don’t have the funds to go shopping for expense artwork, make some yourself. You don’t have to be an artist to do so. Just use a few things around your house and a couple of things from a craft store. And, your art pieces will be so wonderful yet no one will know how little they cost.
Blank canvases attached to wooden frames make a great base for your art. Use foam or regular brushes and make horizontal swipes, allowing ridges to build from brush marks, and minor drips to remain. These wide stripes, in various colors, can represent everything from a sea scape to a field of flowers.
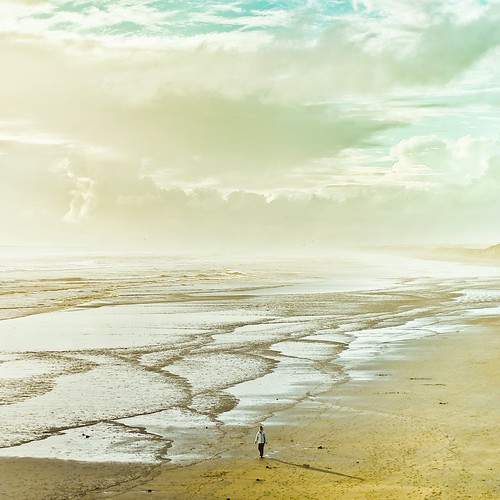
An example is a beach scene made wide, white stripes across the top of the canvas then wide, blue stripes across the bottom. Switch to a smaller brush and make some white stripes, without much pressure on the brush, across the blue section. You can add a yellow circle in one corner, if you wish, but don’t make it too distinctive. Foam brushes allow you to circle the paint without adding much detail.
An example of a field of flowers requires a blue strip across the top third of the canvas, with strips of white included, if desired, then a very wide strip of green across the bottom. Now use a small brush to dot your favorite color of flowers across the green stripe. The flowers don’t have to have to be all the same color, and can overlap each other, too. This gives the effect of one standing in front of the other.
Use these techniques to make many different scenes, such as beach, cornfield, field of flowers, pond with ducks, row of houses, group of kids, and other images. After you get the color on the canvas, add your own real touches, such as a small group of silk daisies, along with a few sprigs of greenery, glued horizontally across the bottom of the canvas. For a beach scene you can glue on shells or even use glue and sand to enhance the design.
Mirrored wall designs are often considered art pieces particularly if they’re arranged in a unique and modern way. Mirrors without frames, but with beveled sides, make the best artwork pieces. Purchase one large mirror, then several smaller ones to start the project. You’ll also need small wooden dowel pieces, of various lengths, from an inch to three inches.
Paint the wooden pegs silver or gold. Hang the large mirror on the wall. Glue two to four of the pegs onto the back of each smaller mirror with contact cement, then attach the smaller mirrors onto the large one. The arrangement is your own, but here are some suggestions: Place one of the mirrors in the top corner, with part of the smaller mirror rising above the large mirror, and the other part of the mirror attached. Add a second mirror, in the same manner, placing it below and to the right of the first small mirror. Position the second mirror to where it extends out slightly past the large mirror. Use different sized pegs for each small mirror to get an even different effect. There are zillions of these mirror designs you can do, combining large, medium, and smaller mirrors attached to each other, some separated, or scattered across the entire wall.
Copper or foil, found on a roll at craft stores, can be used along with stencils to create some unique and beautiful shapes. Choose nice frames and mats then center the copper or foil design in the frame. Make several shapes and arrange them inside of the frame in a design that suits your style. Attach one of the copper or foil shapes to the outside of the frame to add to the beauty of the design. These wall hangings look expensive but aren’t.
Use inexpensive, small slabs of wood and rub-on transfers to make various art pieces for your home. Or, cut out slick magazine pictures of flowers, an old barn, or another image that catches your eye. For a rustic look, slightly burn the edges of the picture before mounting it on the wooden piece. Use the pieces in a manner as the mirrors, or hang them separately across the top of a mantel. The wooden slabs come in any number of sizes, shapes and colors.
There are many ways of making quick art pieces even if you’re not an artist. Combine things that interest you, and fit into your color scheme, and use your own style to create any number of beautiful pieces for your home. You’ll have fun with these projects because if it pleases you, it’s art!
10 Great Tips to Make Any DIY Winter Wedding Photography Successful!

source
This winter many couples are choosing do it yourself wedding photography in an attempt to save money. Wedding photography is tricky because if not done right there will be no good documentation of the special day. My dad does wedding photography as an amateur hobby; wedding photography is not skill less, but can be done easily with practice by almost any amateur photographer. This article will take a look at 10 tips to make DIY winter wedding photography successful; however keep in mind DIY wedding photography takes copious amounts of editing after the ceremony.
1. Camera
Taking wedding photographs should be done with the right camera, not a regular point and shoot camera. I recommend using the Canon EOS Digital Rebel XTi, it takes high quality pictures and is relatively easy to use. This camera can be found at www.buy.com for $569.95, but you should check to see if anyone in the wedding party can provide this camera or a similar model to save on money.
2. Flash
Relying on the built in pop up flash in any camera is a recipe for failure; you will want to use an external flash for low lighting pictures, such as a church or an evening reception. Winter conditions outside will not require a flash due to the reflection of the snow, but it can be used if done right; however inside you will want a powerful flash. I cannot give a recommendation because certain flashes work for different cameras; therefore the flash will be determined by your digital camera choice. www.ritzcamera.com has a good variety of flashes, lenses, and cameras.
3. Lenses
Unfortunately DIY picture taking is not cheap and requires the proper zoom lenses for great photos from anywhere in the room. Buying any secondary lenses is not necessary, but they will make the pictures better. www.ritzcamera.com has a good selection of lenses; it is where I purchased mine.
4. Go Digital
The hardest part of DIY wedding photography is getting professional looking shots. Going digital allows for touchups on the pictures after they are taken so that they come out perfect. Going digital also saves on prints since all the photos can be saved on a flash drive or a CD.
5. Choose an artistic guest for the job
Capturing the right moment is what photography is all about; having a guest that is willing to take pictures who has an artistic eye is the best way to get quality shots. Do not expect a gift from the photographer as it takes hours of work to take and edit great shots.
6. Be aware of lighting conditions
Winter is the hardest time of the year to take photographs outside due to the reflective nature of snow and the brightness of the sun. Be creative on the angles of your photographs; many high end cameras also show the contrast ratio on the photos taken, look at the contrast to make sure the photos are coming out correctly.
7. Be aware of where the sun is
Do not shoot towards the sun or objects that are in the sun, it can cause shadows and some funky looking pictures. Just be aware of the sun and preview one or two pictures before taking more.
8. Capture photos with the theme
If your theme is a winter wonderland then capture that theme in the photos! Try to include shots of the bridal party and newlyweds in the natural theme of the wedding; also try to include guests in the same theme. Be creative with the shots, you may have to shoot at different angles to get the desired results.
9. Use the flash
Even in snowy conditions you should experiment with the flash for better pictures, the bright the background the more the object you are photographing will stand out. This may not always be the case; therefore you should check the pictures being taken to make sure they are coming out professionally.
10. Edit, Edit, Edit
No DIY photography is complete up completion of the ceremony! There are countless hours of editing that must be taken on to get professional looking results. If you do not have the proper computer skills try to find a guest that would be willing to help edit in exchange for their wedding present.
This site has some extra DIY tips that can help during a winter wedding; I did not cover many these tips, so it may be a good read: http://www.squidoo.com/weddingphotographyguide
Sources:
www.ritzcamera.com
http://www.squidoo.com/weddingphotographyguide, DIY Winter Wedding Photography
Sunday, February 27, 2011
Six Tips to Help You Clean and Organize Your Photography Studio

Photo Credit: celtics baby clothes
1. Photography Studio Organization - Use good old fashion hanging files.
Believe it or not, in this digital age, the classic green hanging folder is still a great organization tool. Using manila folders to organize your photography studio's bills, invoices, and receipts is a good start. It is a lost cause however, if you don't have an organized place to put them. The hanging folder is the perfect place to put them
Don't have a filing cabinet to put the hanging folders in? Not a problem. There are several options available at your local retail store. I prefer the clear Rubbermaid bins. They are about 8 inches wide. This means they are easily stored in closets or on a bookshelf. Since photography studio space is usually valuable real estate, these smaller file boxes might be the way to go.
2. Photography Studio Organization - File your files
A great way to keep your files organized is to keep a file of all your files. What do I mean by this? Keep a piece of paper in your photography studio with all of your file folders on with their names. If the folders have sub-folders, list those too.
This will let you see if you have folders that overlap so that you can condense your folders. For example, there is no point in having studio file and a studio equipment file.
You could have this list written on a piece of paper, but that would just be one more piece of paper to file. Try keeping this record in a word or excel document. That way you have one less piece of paper in your office and you can update it much easier when you add new folders and files.
3. Photography Studio Organization - Throw things away
For some reason most photography studio owners have a fear of throwing client paperwork and photos away. There are certain things that you just don't need to hang on to. If you are a digital photographer there is no reason to hold on to basic prints. Create a varity of back-ups and toss the prints. You can always re-print them. If you aren't a digital photographer and have a traditional photography studio, invest in a scanner. This way, if you must hold on to prints for color purposes, you can scan them and toss the print.
There are some things you need to hold onto though.
Tax items are one thing you should hold onto. You should save your tax returns forever. The rest of your tax reports and receipts should be saved for no longer than six years.
Throw away papers that you don't have an immediate need for, can get a copy of easy, or that don't have any tax or legal reason to hold on to.
If you feel like you need to hold on to all your photography studios paperwork, than try scanning it all onto a portable hard drive. Then you can throw all the papers away. It will take more time than growing through all the papers away, but at least the hard drive will take up less space in your office.
You can scan model's head shots for reference later. You can scan pose ideas from magazines so you don't have clipping all over your photography studio.
4. Photography Studio Organization - "Assorted" Folders
How many other, assorted, or misc files do you have in your photography studio? You know, the folder that you put everything in that you just don't know where else to put it. That isn't organization. Odds are you can just throw it away altogether. A good rule of thumb is, if you haven't needed it or touched it in a year then toss it.
5. Photography Studio Organization - Get rid of business cards
There are so many ways to organize all your business cards, model head shots, and contact information. There are plenty of ways to get rid of it altogether as well. A simple approach is to take the business card or headshot and tape it or staple it the file folder it is associated with. At least then it is filed away instead of in a pile on your desk or in a drawer.
There are lots of gadgets out there made for scanning in business cards to your computer. If you are a digital photography studio, you probably already have a scanner, put it to good use. If you don't have the money for one of these than just take some time to enter the contact information into your electronic address book. Outlook has a great address book or you could even use your email clients address book. Anything is better than having them just laying around waiting to get lost.
6. Photography Studio Organization - Use the computer
Try using your photography studio's computer as much as possible. Use it to make your to-do lists, create address books, file documents, and more. The more you keep or put into your computer the less you have in your photography studio.
As I mentioned before, there are plenty of gadgets out there that can help you scan your files into the computer. Take advantage of them!
DIY Wedding Photography: Shot List for the Traditional Couple
photo source
How can you save money on photography for your wedding? Do it yourself! DIY wedding photos won't sacrifice your precious wedding memories. Just make sure you are doing the wedding justice by creating a shot list before the ceremony.
As a traditional couple, you will want "classic" wedding portraits. Make sure you get the following shots for your do it yourself wedding album.
DIY Wedding Photo Shot List - Pictures of the Bride and Groom
Have the bride and groom stand in front of the church. Stand back from the couple so you can get their entire bodies into frame. Make sure to get the entire wedding gown in the picture.
Take a few steps forward, use your zoom, and take a close-up portrait of the bride and groom facing forward.
Have the bride and groom turn their heads and look into one another's eyes. Take a close-up.
Snap a photo of the bride and groom standing in front of the church on their wedding day.
DIY Wedding Photo Shot List - Photos of the Wedding Party
Every wedding album needs a picture that includes the entire wedding party. Line up the bridesmaids and groomsmen with the bride and groom in the center. The flower girl and ring bearer can stand in front of the attendants, but do not place them directly in front of the bride and groom. Doing so would block the bride's wedding gown.
Take some wedding photos of the bride with her bridesmaids. Then take some pictures of the groom with his groomsmen.
Make sure you get a picture of just the flower girl and ring bearer. These cute wedding photos will turn out great!
DIY Wedding Photo Shot List - Pictures of Family Members
Family plays an important role in any wedding. Make sure to include them in the wedding photographs.
Shoot the bride with her family and the groom with his family. Marriage unites these two families, so get a shot of them all together as well.
Make sure to get a picture with the grandparents as well.
DIY Wedding Photo Shot List - Photographs of The Ceremony
The ceremony is the most sacred part of the wedding. Don't be too intrusive while getting your shots. Here are some wedding photos you must get:
Each bridesmaid and groomsmen as they walk toward the altar
The flower girl and ring bearer as they walk down the aisle
The bride walking down the aisle and being given away
Close-up of the groom when he sees his bride
The bride and groom standing at the altar (from behind and from in front if you can manage)
The entire wedding party during the ceremony
Bride and groom's first kiss as a married couple
The couple lighting the unity candle
Bride and groom exchanging rings
Bride, groom, and attendants as they walk back down the aisle
DIY Wedding Photo Shot List - Reception Photos
The reception offers many opportunities to capture the spirit of celebration. Take a lot of journalistic style photographs during the reception of guests dancing, eating, and laughing.
In addition to these spontaneous photos, remember to snap the following pictures:
The bride, groom, and attendants in the receiving line
Groom removing and tossing the bride's garter
Bride tossing her bouquet
The wedding cake being cut and fed to the bride and groom (protect your camera from flying cake!)
The couple's first dance and dancing with their parents
The Most Important Tip for DIY Wedding Photography - Be Creative
This wedding photography shot list will get you started. It is not intended to limit your creativity. These are only the basic poses and wedding pictures a traditional couple would like to have in their wedding photo album. Take these basics and add your own ideas to create a unique wedding gift -- the gift of memories.
Sources
DFM Photography, Wedding Shotlist Helper, http://www.dfmphotography.com/wedding_shotlist.shtml
Personal Experience
Saturday, February 26, 2011
Digital Photography Home-Business Opportunities

credit,photo credit
For the next seven years, digital photography is forecasted to remain steady as a job opportunity for those that are interested in this field. While the competition is expected be strong amongst photographers and the demand for jobs will fall below the number of photographers there are expected to emerge in this field.
The most successful photographers exhibit traits in being creative, able to adapt rapidly to technology changes, and management proficiency. There are digital photography business courses available to help you gain the competitive edge. You will be able to start your own full or part-time business when you develop a good business sens and keep up-to-date on the rapidly changing technology.
There are many areas that you can pursue in a digital photography home business. I will cover a few of the areas for digital photography businesses.
Real Estate
Each year there are millions of homes sold in the US and real estate agents use at least one picture to advertise the property online, in magazines, in brochures, and in newspapers. As a digital photographer you could earn $50 to $100 a house working with real estate agents or others involved in real estate.
Portraits
There are many locations that you can use for a photo shoot. Many people like to have a professional portrait done of themselves for various reasons. The common charge for a shoot is $100 per hour and an additional $50 to $100 for prints and enlargements. There is also a strong demand for pet and children's portraits.
Sports
Being a photographer for sporting events can be profitable and exhilarating. As a sports photographer, you can submit your photos to event organizations, to participants and publications, local news agencies, and a variety of other types of news and sporting sites. The local minor league teams could pay $50 to $200 for team photos with extra sales potential for prints, premium items such as photo trading cards, T-shirts, and reprint. Do not forget your local school teams either as there is a hidden potential for a photo shoot for these teams.
Commercials
Every year there are billions of dollars spent on product advertisements. Commercial photography is normally limited to the more experienced photographers who can charges as much as $2,500 a day for high end product shots. There is also an opportunity for those that can also do shoots for the local chamber of commerce for their websites, local businesses for websites, and a wide array of other ways to earn as a commercial photographer.
Glamour
There are many beauty salons, hair dressers, and modeling agencies that use photos to help promote their services and products. While it is not uncommon for them to pay more than $150 an hour for promotional shoots with images that can be used for brochures, online advertising, point of sale materials, and business cards. There is an opportunity for those that wish to have photos of their staff and customers photographed for in house promotions or for conventions.
Stock Photography
There are agencies that specialize in stock photos that they resell to business for promotional purposes. For you to have your work listed with them they normally require a minimum submission of 300 to 500 photographs. As a stock photographer you can submit photos such as travel photos, landscape, people, animals, still life, and various other types of images that will appeal to their customers. The commissions for stock photographers can range from $5 to $100 for images that their customers purchase through their agencies.
News and Events
Many local newspapers, magazines, and newscasts often look for interesting human interest stories and pictures. The requirements for each of the types of periodicals will vary, but it is possible to have your pictures published, receive credit as a tag line, and possibly a payment for your photo.
Wedding Photography
There are photographers who will establish a wedding package of 25 to 40 prints that will retail for $1,500 to $3000. Normally this a type of shoot will take two days to work, the first day is to shoot the event and the second day is to process and prepare the album.
Graduation
There are parents who wish to have a professional photograph took of their graduate walking down the aisle and across the stage at graduation. The charges for photos could range from $5 to $10.
Whoever Said a Picture is Worth a Thousand Words Probably Didn't Use Positive Images Photography
credit
Well I've come to terms with the fact I'm no Denzel Washington... and I'm okay with that. All I really wanted to do was to take some good quality pictures I could use as profile headshots for my internet businesses and for my business cards, brochures, etc. This was important since I had a deadline coming up that I needed pictures for.
Based on my photography needs, I had wondered was there a photographer where the average looking person can go to get reasonably priced, almost "Star Quality" pictures taken. Also, I preferred that they were local too because I wanted a photographer that I could do business with again on future projects. Just imagine my delight when I found out that there was such a photographer located in Oakland at Positive Images Photography.
The owner is Gisele Bonds (no relation to Barry) and she not only consulted with me on the objectives of my project, she also happened to be a pleasure to talk to. She is very knowledgable. She definitely won points when she suggested that I go home to retrieve a few darker outfits to round out my photoshoot after I mistakenly arrived with all lighter colored outfits. She then explained why and how the darker colored outfits could be used to my advantage in the photoshoot.
As we took pictures she instructed me to pose at various angles and again she told me why those angles were important based on the numerous ways we discussed I could to utilize those pictures in my marketing mix. For instance, some of my pictures were taken with my business' branding in mind so that my company's logo or other images could be easily incorporated into those pictures. Nice!
For someone who's camera shy, I can honestly say I did enjoy Gisele's professionalism and creativity. After what felt to me like a thousand pictures and almost an eternity, we finally finished! At that point my mind started thinking, I hope these pictures look okay. I have to admit, I felt a little self-concious about the prospect of seeing the finished product because I have like many people, facial blemishes. When I mentioned this concern to Gisele she said not to worrry the pictures are going to look good.
Gisele invited me to come in and take a look at all the pictures we took and choose the ones I wanted. She gave me some positive feedback that was helpful and then I selected my favorites.
Later, when I received my Picture Disc I was happy to see that she was so right, my pictures did look good and my facial blemishes were gone... at least in my pictures! Interestingly, I'm told her specialty is working with high school aged students. Her studio is filled with with a plethora of graduation and prom pictures, etc.
She mentors students by providing intern opportunities at her studio and one of her past interns who is in college currently, still works at the studio which to me says alot about the kind of person Gisele is. I think that Positive Images Photography is aptly named and if you're looking for high quality photos, Gisele is the person you need to see. You may soon find that your pictures will be worth much more than a thousand words if you do!